E-scouting part 2: from one unit to five huntable areas
Apply RidgeRead terrain, access, and POI tools to reduce a public-land unit to five field-ready options.
By RidgeRead · Approved 2026-09-10
The objective is not to locate elk from a screen. It is to eliminate country until only three to five realistic areas deserve limited scouting and hunting time.
Define the hunt before filtering the map
Write down the decision context first:
- species and legal hunt unit;
- season and likely elk phase;
- expected snow, temperature, and prevailing wind;
- public access and seasonal road status;
- maximum realistic approach and pack-out effort;
- whether the hunt depends on glassing, calling, still-hunting, or tracking.
These choices control every filter that follows. A late-season rifle screen should not be copied into a September archery plan. The settings are a hypothesis about where elk can meet seasonal needs, not a universal recipe.
Step 1: match RidgeRead Terrain Analysis to the hunt
Open Terrain Analysis, choose the custom workflow, and start with the broadest defensible settings. Filter the unit by:
- Elevation: Keep the band where the season, snow line, forage, and local migration pattern make elk use plausible.
- Slope: Remove terrain that does not fit the expected behavior or a realistic pack-out. Gentler ground can reveal feeding and travel terrain, while steeper adjacent cover can still matter for security.
- Aspect: Choose aspects that fit current sun, snow retention, forage moisture, and thermal conditions.
- Road and building buffer: Use distance from routine motorized access to remove heavily exposed matches.
The example below screens for 8,500 to 10,500 feet, slopes from 0 to 20 degrees, selected aspects, and a one-mile road buffer. Those values fit one post-rut terrain hypothesis. Change them when the unit, season, or weather changes.
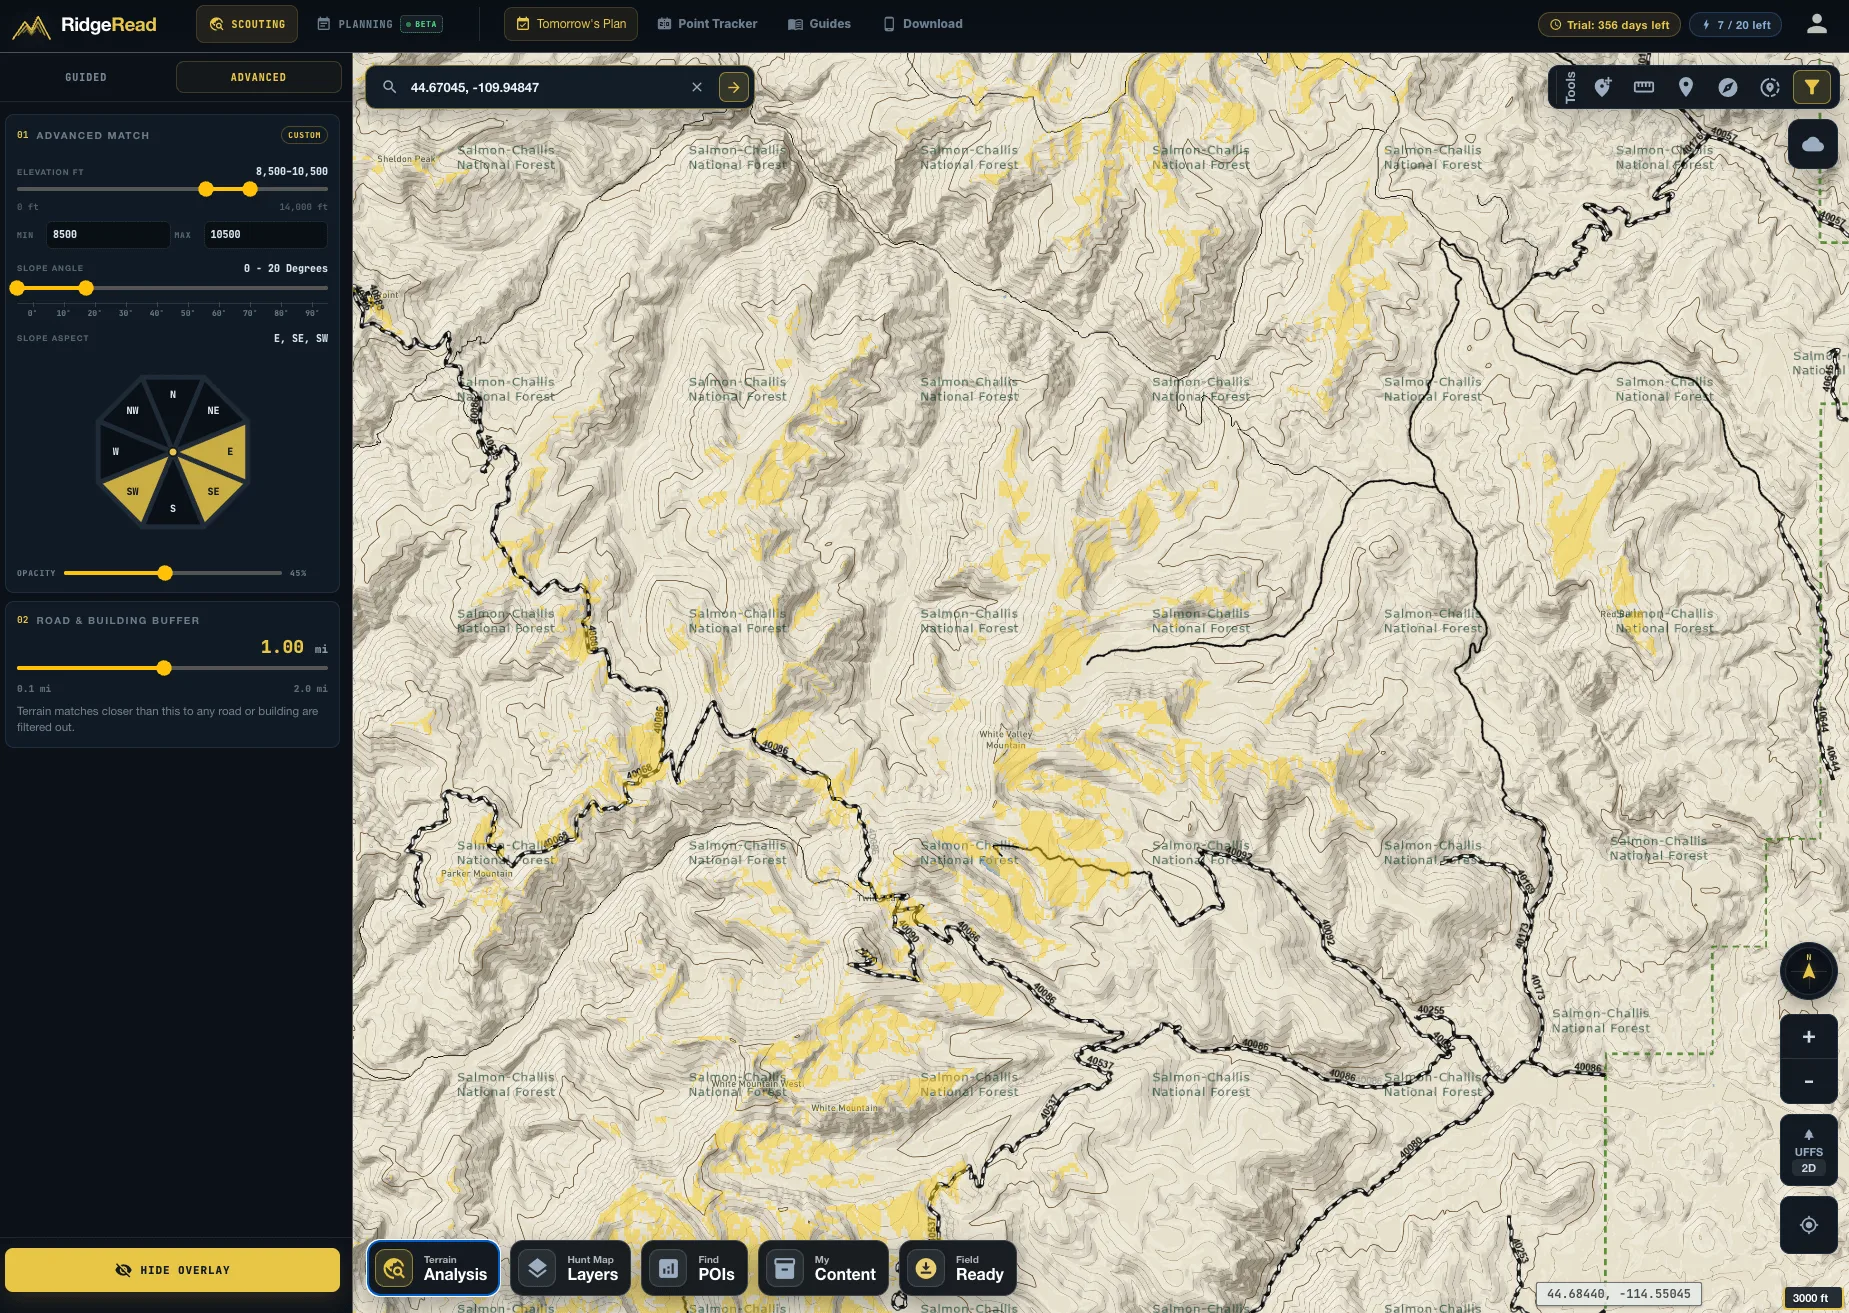
Do not save every yellow match. First look for groups of matches that connect useful terrain across a drainage, ridge system, or basin. A scattered patch with no cover, access plan, or neighboring habitat is usually weaker than a connected system.
Step 2: remove easy-access and high-pressure country
Open Hunt Map Layers and compare the surviving terrain with motorized roads and trails, road density, land status, and the hunt-unit boundary. The goal is not simply to find the point farthest from a road. The goal is to find elk-usable terrain where access pressure, hunter visibility, and travel convenience are lower than in the surrounding country.
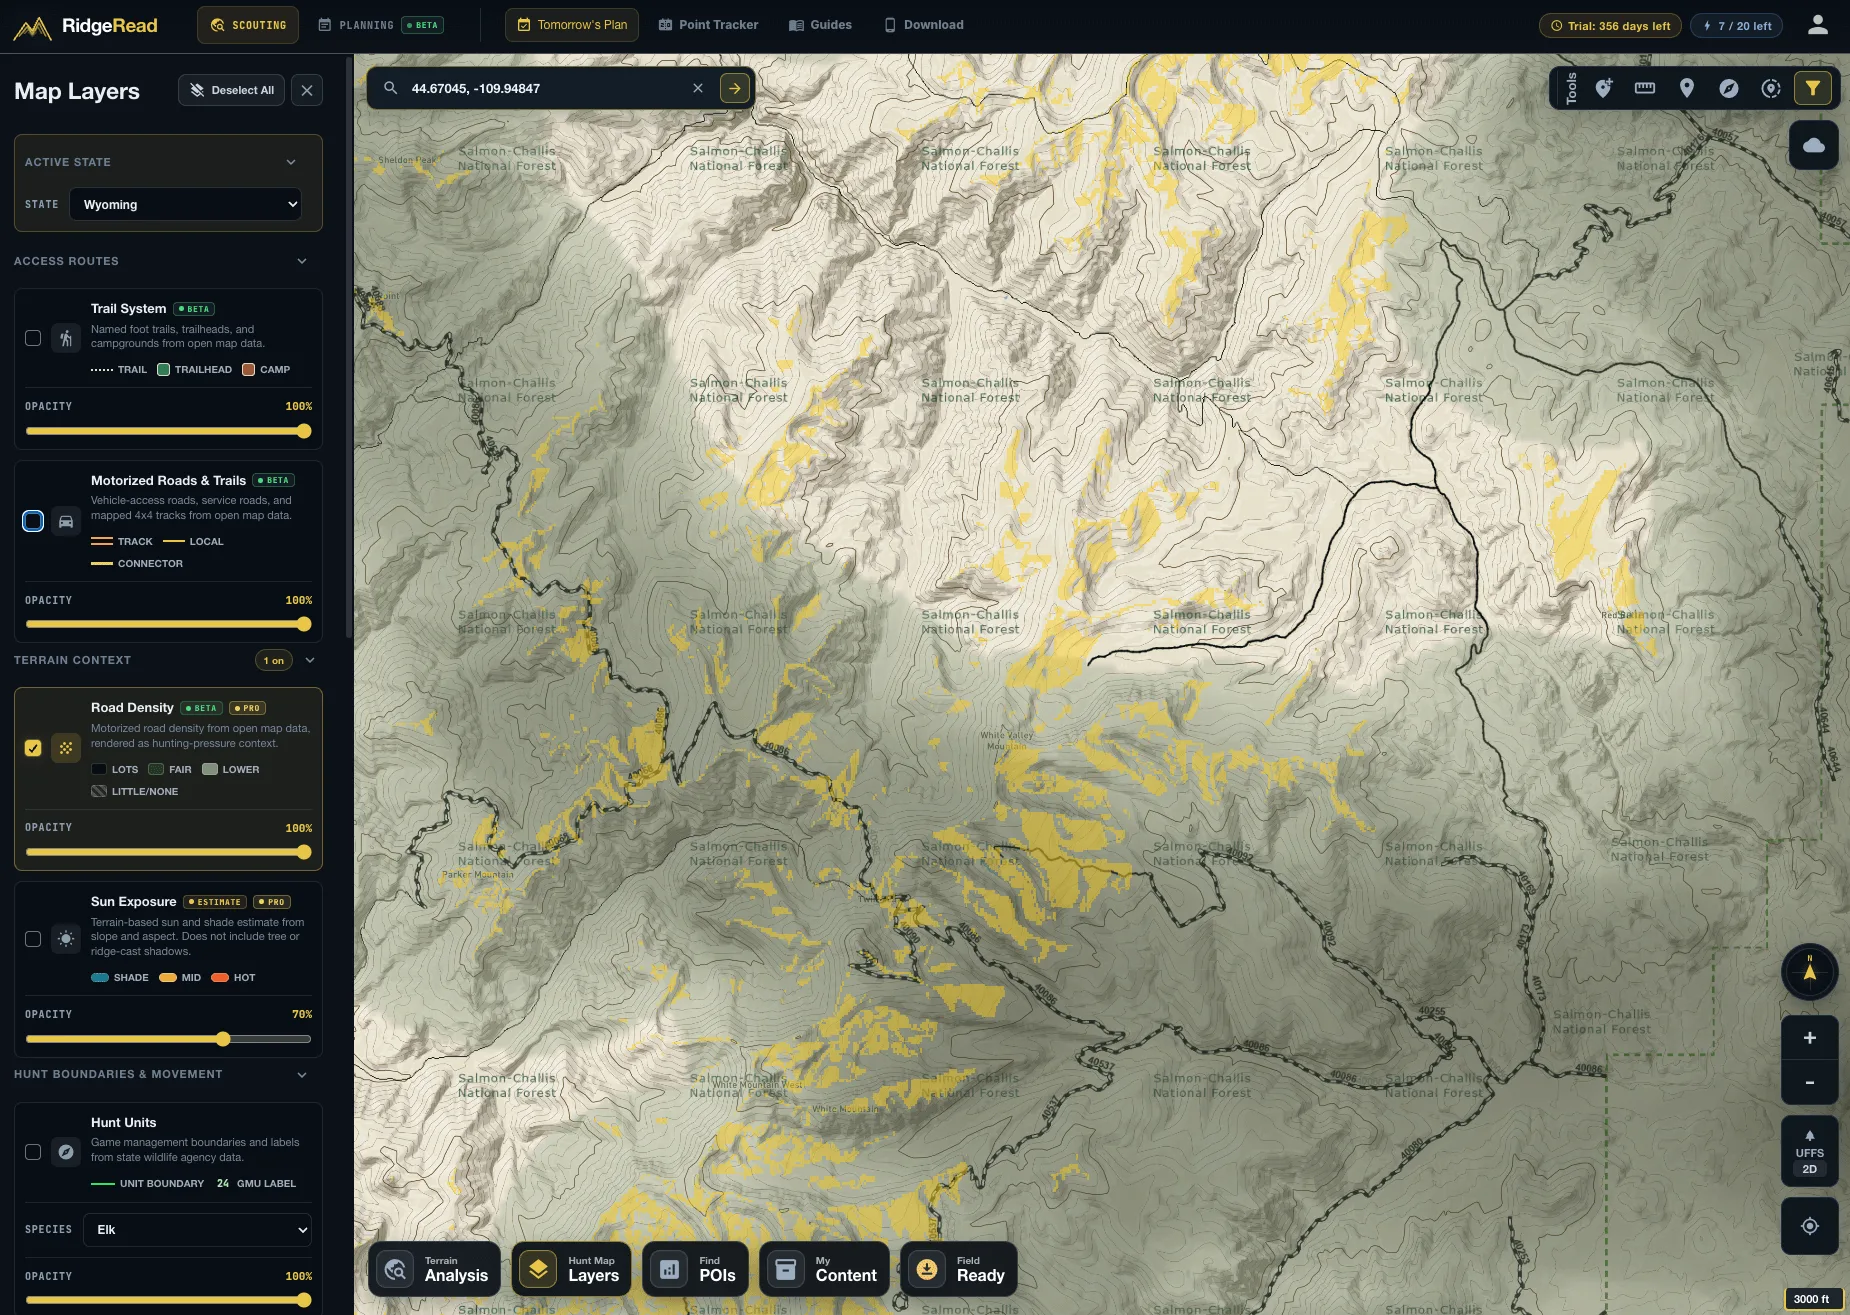
For each surviving cluster, ask:
- Is the highlighted terrain actually on land open to the hunt?
- Is the nearby route legally open during the season?
- Does road density indicate repeated access from more than one direction?
- Can hunters see or glass the area directly from a road?
- Is there a quieter nonmotorized approach that protects the wind?
- Can meat be packed out on the route being considered?
One mile is a useful starting screen, not a guarantee of security. Thick vegetation, steep barriers, closures, road condition, and local hunting behavior can make a shorter distance feel remote or a longer distance feel crowded.
Step 3: inspect feature clusters with Find POIs
Zoom into one surviving area and open Find POIs. Match the season and pressure context, then scan a focused area rather than an entire unit. Compare benches, saddles, drainage heads, travel corridors, and other terrain-backed results.
The important signal is a cluster:
- a bench near secure bedding cover;
- a saddle that connects drainages;
- feed or an opening within practical travel distance;
- a wind-safe approach;
- a glassing angle that is not available from the road;
- a second movement option if pressure blocks the first.
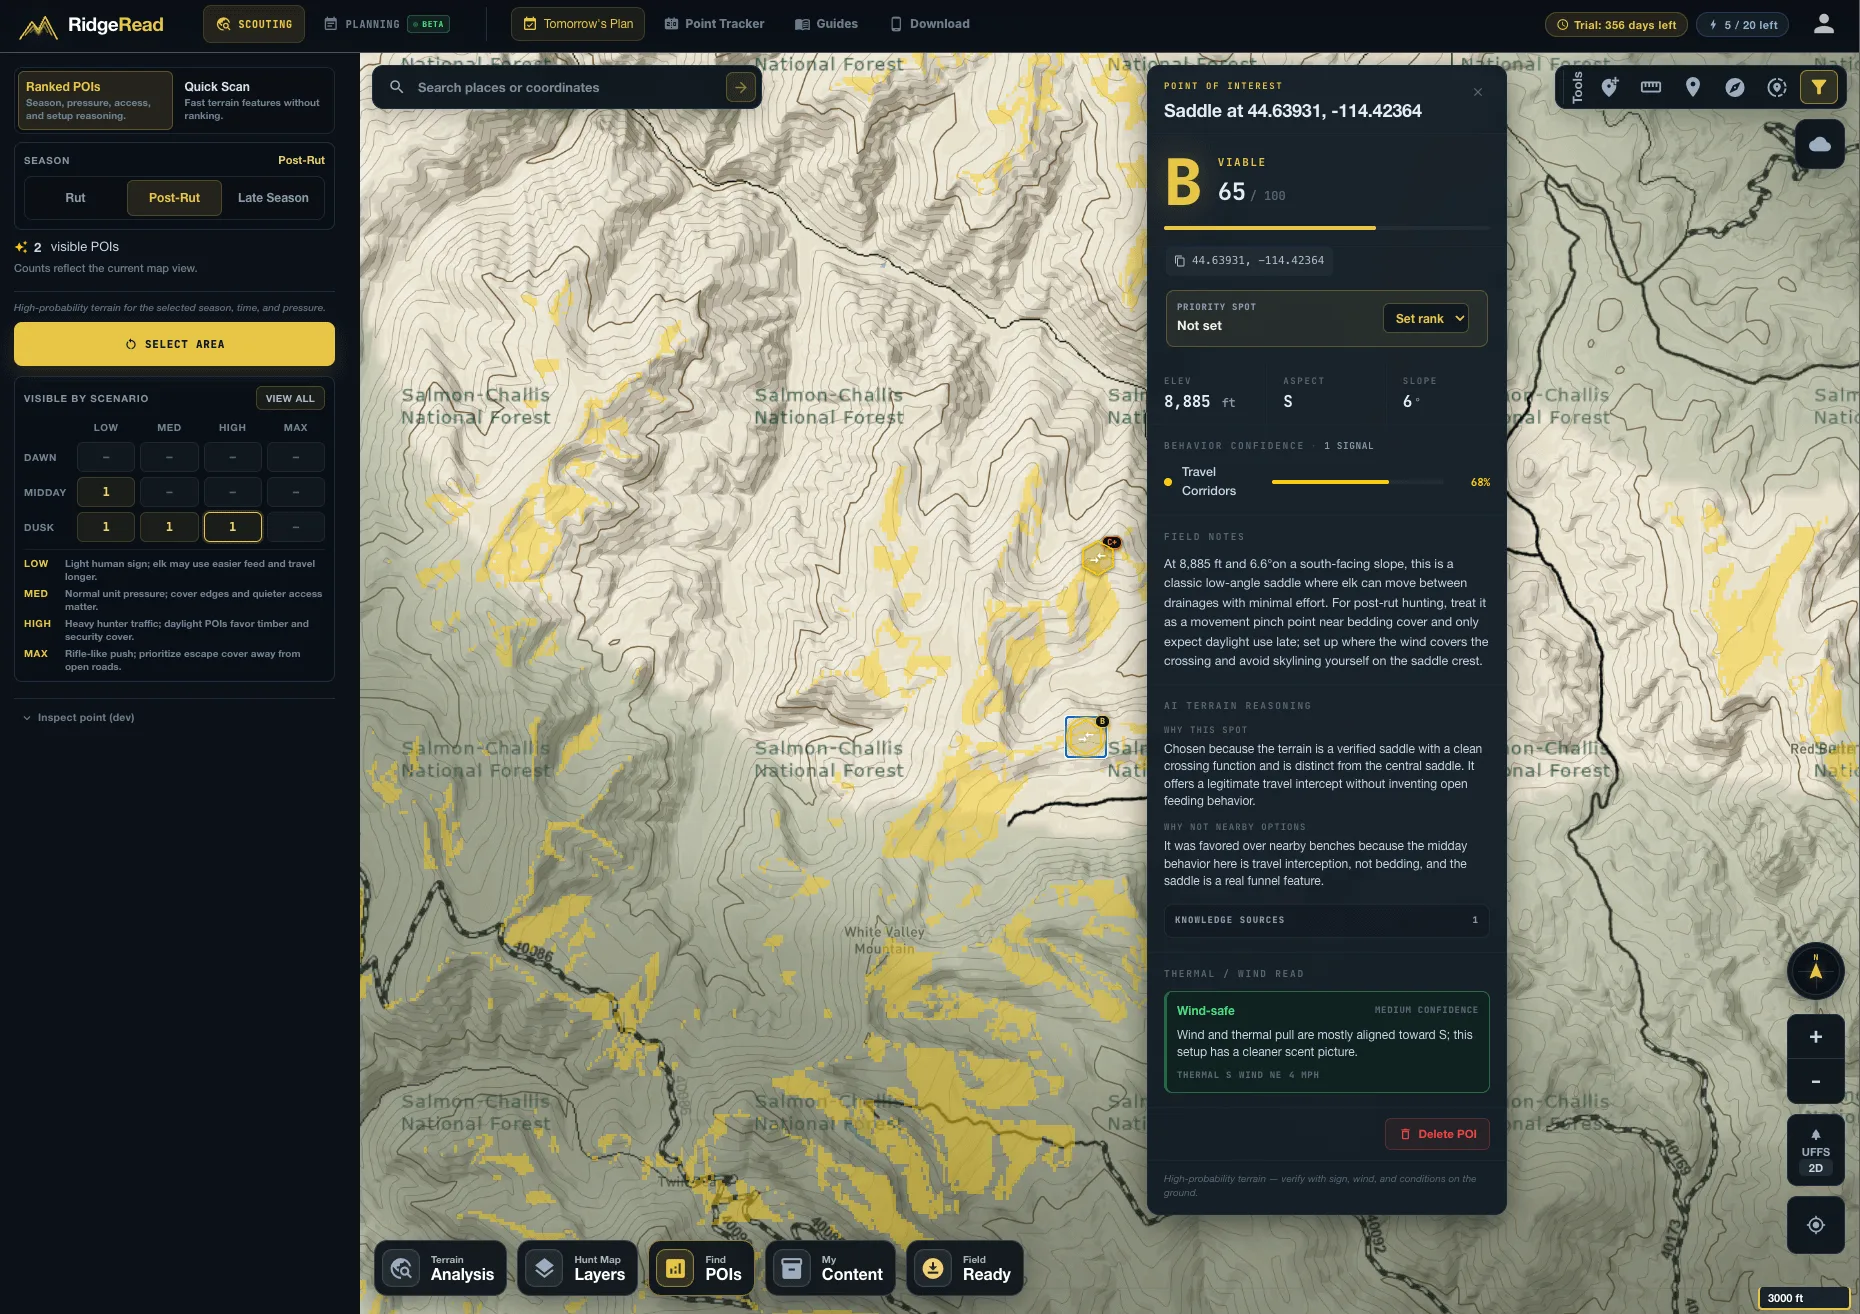
Read the evidence behind each result. In this example, the saddle is relevant because it connects drainages, intercepts travel, and sits near cover. The score organizes terrain evidence; it does not confirm that elk are present. Current sign, wind, access, and field observation still decide whether the spot survives.
Step 4: turn the shortlist into five different jobs
Do not save five look-alike spots in the same basin. Give each area a distinct job so the plan remains useful when elk, weather, or hunters change the day.
| Area role | What earns a place | RidgeRead action |
|---|---|---|
| Primary | Best combination of seasonal terrain, habitat connections, legal access, wind, and pack-out feasibility | Save the strongest terrain match and rank it first in My Content |
| Backup | A complete habitat system separated from the primary by a drainage, ridge, or access route | Save it as a separate area, not another pin inside the primary |
| Pressure escape | Security cover and travel terrain away from obvious roads, trailheads, and common approaches | Note the pressure assumption and the route that avoids displacing elk |
| Weather or late-day | Terrain that becomes more useful with a wind shift, snow, temperature change, or narrow evening movement window | Record the condition that activates the area |
| Glassing and verification | One or more observation points that reveal hidden feed, travel routes, or openings not visible from a road | Save the glassing points and identify exactly which terrain each one can verify |
Organize the field-ready plan
Use My Content to keep the shortlist understandable at a glance:
- name areas consistently, such as
Unit 42 / A / Primary; - place related waypoints and terrain matches in one folder;
- rank the areas in the order they should be checked;
- add the reason each area survived the screen;
- record the wind, weather, pressure, or time-of-day condition that changes the plan;
- measure the real approach and pack-out route;
- download the areas and connecting routes before leaving service.
The finished plan should answer five questions for every area: Why could elk use it? Why might elk feel secure there? How will the hunter enter? What would disqualify it? Where does the plan move next? If an area cannot answer those questions, it is still an interesting map location, not a hunt plan.
Ground verification
When preseason scouting is possible, verify:
- actual water presence;
- current forage quality;
- bedding cover and escape terrain;
- road and trail status;
- human use;
- wind and thermal behavior;
- old rubs and wallows that reveal historical rut use.
Fresh summer bull sign is not required for a September area to be valuable. Cow groups and historical rut sign can be more informative because bulls may arrive later when breeding behavior intensifies.
Common e-scouting errors
- Treating a waypoint as confirmed reality.
- Using old wet-season imagery as proof of current water.
- Mapping individual needs without checking their proximity.
- Selecting bedding solely by aspect and ignoring escape routes.
- Measuring straight-line distance while ignoring vertical gain and terrain barriers.
- Confusing easy hunter access with good elk security.
- Saving so many pins that no clear priorities remain.
- Failing to verify legal access, seasonal closures, or private boundaries.
- Wandering after arrival instead of checking the mapped hypotheses systematically.